Okay, here we go, ready to finally start sewing. I decided to hand piece (as opposed to using a sewing machine) because I wanted a portable project that I could easily take with me anywhere. Also, I really don't like all the noise a sewing machine makes. Here's how I do it:
 1. With right sides together, insert a pin into one corner, making sure they line up exactly.
2. Insert a threaded needle into the other corner.
3. Continue pinning, making sure the pin lines up perfectly along the guides.
 4. Start sewing, beginning with a backstitch (you don't knot threads when quilting).
5. Make little stitches along the guide.
6. Before pulling the needle through, check the other side to make sure you're sewing on the guide.
 7. End with a backstitch and snip the tread.
8. Admire your work.
9. Rub your fingernail along the seam to press it.
11. The seams flip each row (press away from center, press to center, press away from center).
 12. Insert a pin right beside a seam along the guides.
13. Check the front to make sure the pin is as close to the seam as possible.
14. Line the pin up with the other strip, again making sure everything is lined up.
 15. Insert another pin, so that there are pins in the middle seams.
16. Lining up the seams, continue pinning.
17. Do the same steps with a third pin, and insert a threaded needle into the opposite end.
 18. Sew along the guide until you get the the first seam. Make a backstitch right up next to the seam.
19. Sew though the seam. Then repeat the same steps on the other side of the seam.
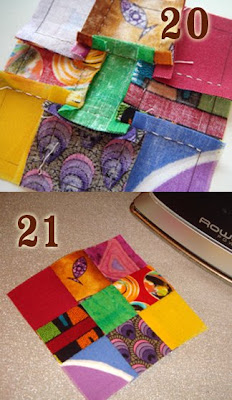
20. Repeat until you have your completed square.
 20. Flip the piece over and push the seams in this complicated pattern. (And yes, I know there are two number 20's but I'm too far along at this point to fix it.)
21. Press gently with an iron, and admire your handiwork!


No comments:
Post a Comment